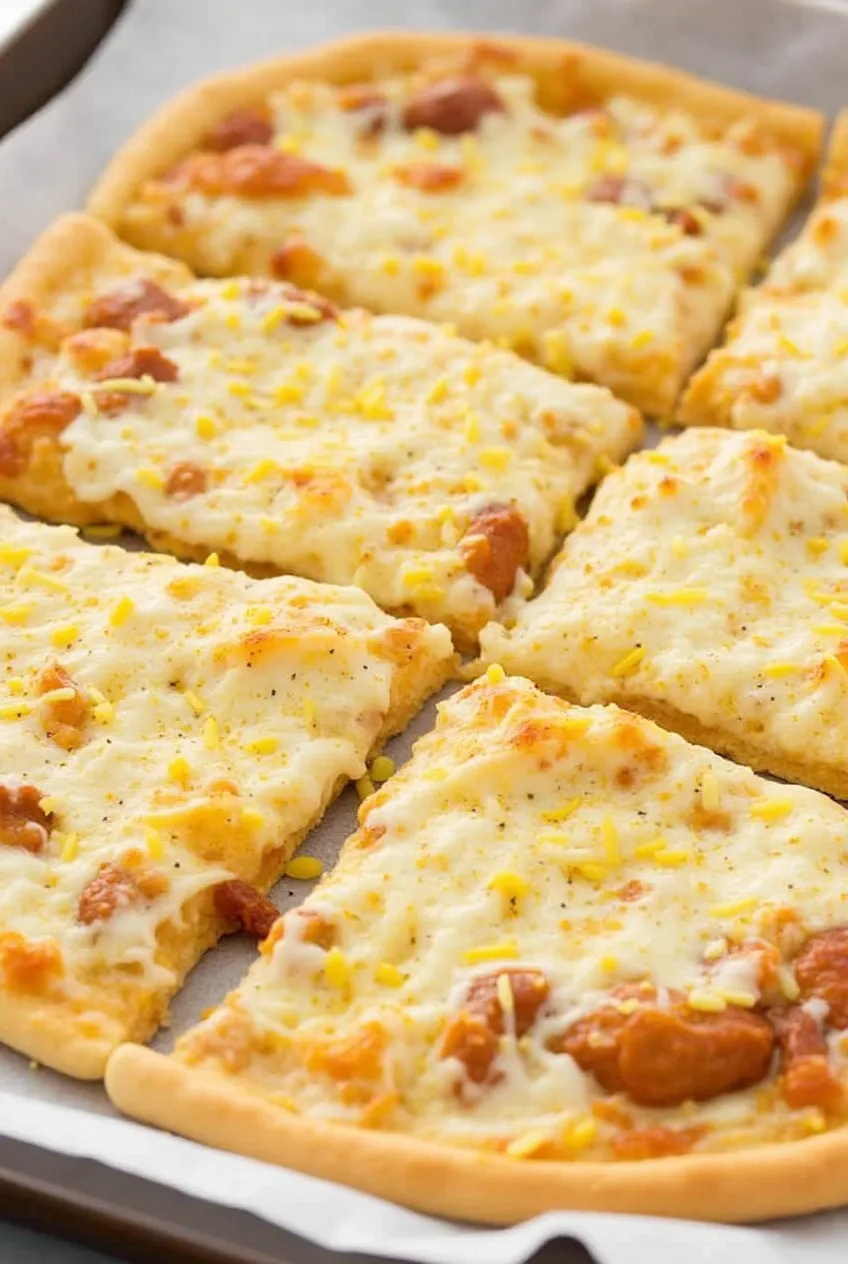
10 minute canned chicken pizza crust recipe
Hey there! Have you ever wished you could whip up a delicious pizza at home that’s quick, packed with protein, and just downright unique? Well, you’re in the right place because this canned chicken pizza crust recipe is about to change the way you think about pizza forever. Seriously, using canned chicken as the base for your pizza crust might sound a little unconventional, but trust me—it works wonders!
Why is this recipe perfect for you? If you’re someone juggling a busy schedule but still want to serve a tasty, homemade meal, or if you’re watching your carbs but refuse to give up pizza nights, this recipe has got your back. Not to mention, it’s a fantastic way to use pantry staples (yes, canned chicken!) to create something truly special. Whether you’re cooking for family dinners, meal prepping, or looking for a keto-friendly or gluten-free pizza crust alternative, this recipe is incredibly versatile and simple.
What’s even better? This pizza crust recipe cuts out the fuss of traditional dough-making. No yeast, no waiting for rising, and no mess! Instead, you get a high-protein, low-carb, and flavorful base that holds up perfectly with your favorite toppings—think mozzarella, tomato sauce, and maybe some bell peppers or mushrooms. Plus, it’s a brilliant way to sneak in extra protein if you’re a fitness buff or just love hearty meals.
Stick with me, and I’ll walk you through everything from the essential ingredients and equipment to foolproof steps, handy tips, and little tricks that will make your canned chicken pizza crust a family favorite. Ready to revolutionize your pizza game? Let’s get cooking!
Ingredients
Alright, let’s talk about what you’ll need to create this delicious canned chicken pizza crust recipe. The best part? Most of these ingredients you probably already have in your pantry or fridge.
| Ingredient | Quantity | Notes/Substitutes |
|---|---|---|
| Canned chicken | 1 can (12.5 oz) | Use quality canned chicken brands like Bumble Bee or Kirkland |
| Shredded mozzarella cheese | 1 cup | Can substitute with cheddar or parmesan for variation |
| Eggs | 2 large | Acts as a binder; flax eggs work for vegan option |
| Almond flour | ¼ cup | Substitute with coconut flour (use less quantity) |
| Garlic powder | 1 teaspoon | Optional but adds great flavor |
| Italian seasoning | 1 teaspoon | Can use dried oregano and basil |
| Salt | ½ teaspoon | To taste |
| Black pepper | ¼ teaspoon | Freshly ground preferred |
Substitutes for Key Ingredients
- Canned Chicken: If you don’t have canned chicken, cooked shredded chicken breast works just as well. Just make sure it’s well-drained.
- Almond Flour: If you have a nut allergy, coconut flour is a great gluten-free alternative, but remember to adjust the quantity as coconut flour is more absorbent.
- Cheese: Mozzarella is classic for that gooey texture, but you can experiment with cheeses like provolone or gouda for a richer taste.
- Eggs: If you’re vegan or allergic, you can use flax or chia eggs (1 tablespoon ground flaxseed + 3 tablespoons water per egg).
This blend of ingredients ensures your pizza crust is not only tasty but also holds together nicely when baked—no crumbly mess here! Plus, using canned chicken adds a savory protein punch that makes this recipe stand out from regular flour-based pizza crusts.
Equipment Needed
Before you dive into mixing, here’s a quick rundown of what you’ll need to make your canned chicken pizza crust recipe a breeze. Don’t worry—it’s nothing fancy or expensive.
Essential Tools
- Mixing Bowl
You’ll want a medium to large mixing bowl to combine all the ingredients smoothly. Stainless steel or glass bowls work great. - Fork or Whisk
For beating eggs and mixing spices into your batter. - Spatula or Spoon
To help fold in the cheese and chicken evenly. - Baking Sheet or Pizza Pan
A non-stick pizza pan is ideal, but a regular baking sheet lined with parchment paper works just fine too. - Oven
Your trusty oven will do the heavy lifting for baking the crust to a perfect golden finish.
Optional Equipment for Enhanced Results
- Pizza Stone
If you have a pizza stone, it helps distribute heat evenly and gives your crust a crispier bottom. - Food Processor
For those who prefer an ultra-smooth texture in the crust, pulsing the canned chicken briefly in a food processor before mixing can help. - Rolling Pin
Optional if you want to flatten the crust evenly, but you can also pat it down with your hands.
What to Look for in Equipment
- Best Mixing Bowl: Choose a bowl with a wide opening to mix easily and avoid spills.
- Best Pizza Pan: Look for pans with a non-stick surface and shallow edges to let the crust crisp well.
- Oven Settings: Make sure your oven can reach 400 to 425°F for optimal baking temperature.
Having the right tools ready makes your cooking experience smooth and enjoyable, setting you up for pizza success without any stress.
Instructions
Now that you have all your ingredients and tools ready, it’s time to roll up your sleeves and get cooking! Don’t worry—this canned chicken pizza crust recipe is surprisingly simple and perfect even if you’re not a kitchen pro. Ready? Let’s dive in.
Step 1: Prep Your Ingredients
First things first, open your can of chicken and drain it thoroughly. Excess liquid can make your crust soggy, and nobody wants that. Once drained, transfer the canned chicken to your mixing bowl. If you prefer a smoother crust texture, you can pulse the chicken a couple of times in a food processor—but this is totally optional.
Next, shred your mozzarella cheese if it’s not pre-shredded. Freshly shredded cheese melts better and adds that gooey, cheesy magic to your crust.
Step 2: Mix the Base Ingredients
In the mixing bowl with the canned chicken, add the eggs, shredded mozzarella, almond flour, garlic powder, Italian seasoning, salt, and pepper. Now, here’s where the fun begins! Use your spatula or spoon to fold everything together gently but thoroughly. You want a uniform mixture where all the ingredients are well combined, and you don’t see large clumps of cheese or chicken.
If your mixture feels too wet or loose, add a little more almond flour—but be careful not to add too much, or the crust might become dry and crumbly.
Step 3: Shape the Pizza Crust
Next, it’s time to get your hands a little messy (don’t worry, it’s part of the fun). Lightly grease your pizza pan or line your baking sheet with parchment paper. Pour the mixture onto the pan, then use a spatula or your hands to spread it out evenly, shaping it into a circle or rectangle about ¼-inch thick. You want the crust to be even so it cooks consistently.
If you have a rolling pin, you can use it to smooth the crust out, but patting it down with your hands works just as well.
Step 4: Bake the Crust
Pop the crust into your preheated oven at 425°F (220°C). Bake for about 12 to 15 minutes, or until the crust turns golden brown and is firm to the touch. You’re looking for a nice crispy bottom that will hold your toppings without getting soggy.
Pro tip: halfway through baking, check the crust’s edges. If they’re browning too fast, you can cover them lightly with foil to prevent burning.
Step 5: Add Your Favorite Toppings
Once your crust is baked, it’s pizza time! Spread a thin layer of tomato sauce or your favorite pizza sauce over the crust. Then, pile on your favorite toppings—think diced bell peppers, mushrooms, olives, onions, or extra shredded cheese. And don’t forget a sprinkle of fresh herbs like basil or oregano for that extra flavor punch.
Step 6: Final Bake to Melt and Meld
Return the pizza to the oven and bake for an additional 8 to 10 minutes. This step melts the cheese, warms the toppings, and lets all those flavors come together beautifully. When your cheese is bubbly and golden, and your crust edges look perfectly crisp, you’re ready to take it out.
Step 7: Slice and Serve
Let your pizza cool for a few minutes—this helps the crust firm up even more and makes slicing easier. Use a sharp pizza cutter or a large knife, slice into your desired portions, and dig in!
Tips & Tricks for Success
Cooking this canned chicken pizza crust recipe is easy, but these insider tips will make your pizza night even better.
Perfect Cooking Time
Timing is everything! Bake the crust initially for 12 to 15 minutes to get it firm and golden, then add toppings and bake again for about 8 to 10 minutes. Adjust these times slightly depending on your oven, but don’t rush—the crust needs that initial bake to avoid sogginess.
Make Your Pizza Even Better
- Add herbs to your crust mix—a pinch of dried oregano or crushed red pepper flakes can add a little extra kick.
- Try different cheeses like sharp cheddar or smoked gouda to switch up the flavor.
- Use pre-cooked canned chicken mixed with a bit of hot sauce for a spicy crust twist.
- Top with fresh veggies or even pineapple for a sweet and savory combo.
Common Mistakes to Avoid
- Don’t skip draining the canned chicken! The moisture will ruin your crust’s texture.
- Avoid adding too much flour. More isn’t always better; it can dry out the crust.
- Don’t overload the toppings. Too many toppings can make your pizza soggy.
- Be patient with baking. If your crust isn’t firm enough after the first bake, give it a few extra minutes.
Time-Saving Tips
- Prep your toppings while the crust is baking to save time.
- Use pre-shredded cheese to cut down prep.
- Mix the crust ingredients directly in the baking pan (if it’s oven-safe) to reduce cleanup.
- Double the recipe and freeze one pizza for a quick meal later.
Variations and Substitutes
You might be wondering, “Can I tweak this canned chicken pizza crust recipe to fit my diet or taste buds?” Absolutely! This recipe is surprisingly flexible and can cater to different dietary needs or creative cravings.
Variations for Different Diets
- Gluten-Free: The original recipe already uses almond flour, which makes it gluten-free! Just be sure your canned chicken and other ingredients don’t have any hidden gluten additives.
- Keto-Friendly: Stick to the almond flour base and add extra cheese or cream cheese for richness. This keeps carbs low while boosting fat and protein.
- Vegan: While canned chicken and eggs aren’t vegan, you can replace them with mashed chickpeas or firm tofu and flax eggs (1 tablespoon ground flaxseed mixed with 3 tablespoons water per egg) to make a vegan-friendly crust. Cheese can be swapped with vegan cheese or nutritional yeast for flavor.
Creative Twists to Try
- Spicy Crust: Mix in some crushed red pepper flakes or a dash of hot sauce into the batter for a fiery kick.
- Herb-Infused: Add fresh chopped rosemary, thyme, or basil for a fragrant, garden-fresh flavor.
- Cheesy Crust: Sprinkle extra parmesan or mozzarella inside the batter or on the crust edges for that ooey-gooey cheese pull.
- Stuffed Crust: Once the crust is partly baked, fold the edges over string cheese sticks for a delicious stuffed crust effect.
By experimenting with these twists and substitutions, you can keep your pizza nights fresh and exciting while sticking to your dietary preferences!
How to Serve Canned Chicken Pizza Crust Recipe
Now, let’s talk about serving this delicious homemade pizza to impress your family or guests.
Best Side Dishes to Pair With
- Fresh Garden Salad: A crisp, tangy salad with mixed greens, cherry tomatoes, and a light vinaigrette balances the rich and cheesy pizza crust perfectly.
- Roasted Vegetables: Try roasting asparagus, zucchini, or bell peppers drizzled with olive oil and herbs for a colorful and healthy side.
- Garlic Breadsticks: Keep the Italian vibe going with some easy garlic breadsticks on the side.
- Dipping Sauces: Ranch, marinara, or a spicy buffalo sauce can be great for dipping those crispy crust edges.
Serving Suggestions for Occasions
This canned chicken pizza crust is incredibly versatile, making it perfect for:
- Family Dinners: Quick and satisfying meal that kids and adults love.
- Game Nights: Easy to slice and share with friends.
- Meal Prep: Bake once, slice, and pack for lunches or quick dinners during the week.
- Low-Carb Parties: A hit among keto or low-carb diet followers who still want their pizza fix.
Pair it with your favorite beverage and some good company, and you’re set for an unforgettable meal!
Nutritional Information
Wondering how this canned chicken pizza crust recipe stacks up nutritionally? Here’s a rough estimate per serving (assuming 4 servings total):
- Calories: Approximately 280-320 calories per serving
- Protein: Around 25 grams — thanks to the canned chicken and cheese, this pizza is a protein powerhouse!
- Carbohydrates: Roughly 5-7 grams, making it great for low-carb or keto diets
- Fat: About 18 grams, mainly from cheese and almond flour, which include healthy fats
- Fiber: 2-3 grams from the almond flour and any veggies you add on top
How to Make It Healthier
- Use low-fat cheese to reduce saturated fat content.
- Load up on fresh veggies as toppings to boost fiber, vitamins, and antioxidants.
- Swap almond flour for a mix with ground flax or chia seeds for more omega-3 fatty acids.
- Use homemade tomato sauce with no added sugar to keep it clean.
With this balance of protein, healthy fats, and low carbs, this recipe fits nicely into many balanced eating plans!
Conclusion
Why will you love this canned chicken pizza crust recipe? Because it’s quick, easy, and packs a nutritional punch while still delivering all the comfort and joy of classic pizza. Whether you’re a busy professional, a health-conscious eater, or just craving something delicious and different, this recipe has got you covered. So why not give it a try and add your own creative spin? Trust me, once you make this crust, you’ll never look back!
Let us know how it turned out in the comments below! Don’t forget to share this recipe with your friends and family so they can enjoy this easy homemade pizza hack too. And for more tasty, easy recipes, follow us on social media!
Frequently Asked Questions
What does canned chicken pizza crust taste like?
Canned chicken pizza crust has a savory, cheesy flavor with a hint of garlic and herbs from the seasoning. The texture is slightly different from traditional dough—more protein-rich and a bit denser—but it crisps up nicely in the oven and holds toppings well. Many find it a delicious low-carb alternative to regular pizza crust.
Can I use fresh chicken instead of canned chicken?
Yes! You can use cooked, shredded fresh chicken breast as a substitute. Just make sure it’s well-drained and not too moist. The texture may be slightly different, but the taste will be just as great.
Is this recipe suitable for keto or low-carb diets?
Absolutely. This recipe is low in carbohydrates due to the almond flour and high in protein and fat from the chicken and cheese, making it an excellent choice for keto or low-carb meal plans.
Can I freeze the canned chicken pizza crust?
Yes, you can! After baking the crust (before adding toppings), let it cool completely, then wrap it tightly in plastic wrap and aluminum foil. Freeze for up to 2 months. When ready to use, thaw in the fridge overnight and add toppings before the final bake.
How do I prevent the crust from being soggy?
Drain the canned chicken very well to remove excess moisture, and don’t overload your pizza with heavy or watery toppings. Baking the crust first until it’s firm and golden before adding toppings also helps keep it crisp.