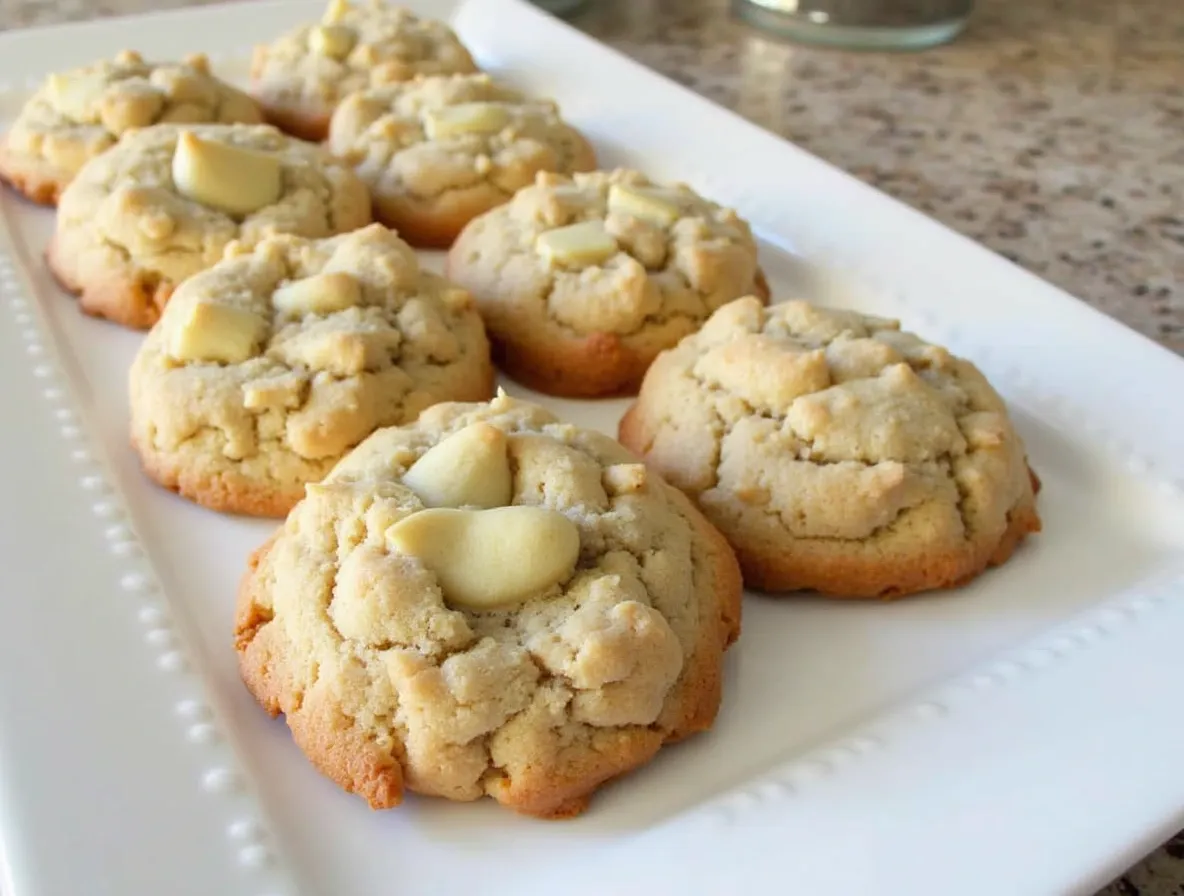
Cheryl’s cookies recipe with 3 ingredients
If you’ve ever walked past a Cheryl’s Cookies store, you know the temptation that comes with that delicious, sweet aroma wafting through the air. Cheryl’s Cookies are known for their soft, chewy texture and irresistible flavors. Whether you’re celebrating a special occasion or simply craving a delicious homemade treat, there’s nothing quite like Cheryl’s Cookies.
But what if you could recreate that same magic at home? Sounds too good to be true, right? Well, I’m here to show you that it’s completely possible! Today, I’m sharing an easy-to-follow Cheryl’s Cookies recipe that will have your kitchen smelling like a bakery in no time.
In this article, you’ll learn how to make these scrumptious cookies step-by-step, with tips and tricks to ensure they turn out perfectly every time. From the ingredients to the baking process, I’ll walk you through everything you need to know. Plus, I’ll show you some fun variations and substitutes so you can tailor this recipe to your taste or dietary preferences. So grab your apron, and let’s dive into the world of Cheryl’s Cookies!
Why This Recipe is Perfect for Any Occasion
Whether you’re baking for a birthday party, a holiday celebration, or just to satisfy that cookie craving, this Cheryl’s Cookies recipe is sure to impress. Soft, chewy, and bursting with sweetness, they make the perfect dessert for virtually any occasion. The best part? This recipe is incredibly easy to make, even for beginners.
By recreating Cheryl’s signature soft cookies at home, you get to enjoy the same great taste but with a personalized twist. You can adjust the flavor to your liking, experiment with different ingredients, or even make them healthier (I’ll share some tips on that later!). Trust me, once you taste these cookies, you’ll never want to go back to store-bought again.
Ingredients
Now, let’s talk about the magic behind Cheryl’s Cookies—what goes into making them so delicious and soft? Here’s a rundown of the essential ingredients you’ll need:
| Ingredient | Amount |
|---|---|
| Unsalted butter | 1 cup (softened) |
| Granulated sugar | 1 cup |
| Brown sugar | 1 cup (packed) |
| Large eggs | 2 |
| Vanilla extract | 1 tsp |
| All-purpose flour | 3 cups |
| Baking soda | 1 tsp |
| Salt | 1/2 tsp |
| Optional: Chocolate chips | 1 cup |
Essential Ingredients for Cheryl’s Cookies Recipe
- Butter: The key to those soft, chewy cookies is butter. It gives the cookies that rich flavor and helps create the soft, melt-in-your-mouth texture.
- Granulated sugar and brown sugar: A combination of these two types of sugar gives the cookies a perfect balance of sweetness and moisture. Brown sugar, in particular, adds a hint of caramel flavor that elevates the taste.
- Eggs: Eggs bind the dough together and help give the cookies structure while keeping them soft.
- Vanilla extract: This is essential for flavor. A good-quality vanilla extract will make a huge difference in taste.
- All-purpose flour: Flour is the backbone of the recipe, providing the structure and texture to the cookies.
- Baking soda: This helps the cookies rise slightly, ensuring they bake up perfectly soft.
- Salt: Just a pinch of salt enhances the flavors and balances the sweetness.
Substitutes for Key Ingredients
If you need to make substitutions, here are a few options:
- Butter substitute: You can use margarine or coconut oil for a dairy-free version.
- Sugar substitutes: If you’re trying to cut back on sugar, you can swap out half of the granulated sugar with a sugar substitute like stevia or monk fruit.
- Flour alternatives: For a gluten-free version, you can use a gluten-free flour blend in place of the all-purpose flour.
Equipment Needed
Before we get started, let’s make sure you have the right tools for the job. Here’s what you’ll need:
Essential Tools for Making Cheryl’s Cookies
- Mixing bowl: For combining the ingredients. Make sure it’s large enough to handle all the dough.
- Electric mixer (stand or hand-held): While you can mix by hand, an electric mixer will make the process much easier and faster.
- Baking sheets: You’ll need two baking sheets for baking the cookies. Make sure they are lined with parchment paper to prevent sticking.
- Cooling rack: After baking, it’s important to let your cookies cool properly, and a cooling rack allows air to circulate around them, preventing them from getting soggy.
Optional Equipment for Enhanced Results
- Cookie scoop: If you want perfectly round cookies, a cookie scoop can help you achieve uniform size and shape.
- Stand mixer: If you bake cookies often, a stand mixer will make the process faster and less tiring.
What to Look for in Baking Equipment
- Best mixing bowl: Look for a sturdy, large mixing bowl that won’t tip over when mixing the dough. Glass or stainless steel are great options.
- Best baking sheet: Invest in a good-quality baking sheet with a non-stick surface or use parchment paper to avoid cookies sticking.

Step-by-Step Instructions
Step 1: Prepare Your Ingredients
Before you start mixing, it’s a good idea to get all your ingredients ready. Measure out the butter, sugars, eggs, and flour. Preheat your oven to 350°F (175°C), so it’s nice and hot when you’re ready to bake.
Step 2: Cream the Butter and Sugars
In a large mixing bowl, combine the softened butter, granulated sugar, and brown sugar. Using your electric mixer, beat the ingredients together until light and fluffy. This usually takes about 2-3 minutes. Don’t rush this step—it helps create that perfect soft texture!
Step 3: Add the Eggs and Vanilla Extract
Add the eggs, one at a time, mixing well after each addition. Then, stir in the vanilla extract. You’ll start to notice the dough coming together as it forms a smooth batter.
Step 4: Mix the Dry Ingredients
In a separate bowl, whisk together the flour, baking soda, and salt. Gradually add the dry mixture to the wet ingredients, mixing until combined. Be careful not to overmix, or your cookies could turn out tough!
Step 5: Add the Chocolate Chips (Optional)
Now for the fun part—folding in the chocolate chips! Add them to the dough and gently stir until evenly distributed. You can also add other mix-ins like sprinkles, nuts, or dried fruit if you’re feeling creative.
Step 6: Scoop and Bake
Scoop tablespoon-sized balls of dough and place them onto your prepared baking sheets, leaving about 2 inches of space between each one. Bake for 10-12 minutes, or until the edges are golden brown but the centers are still soft. Let the cookies cool on the baking sheets for a few minutes before transferring them to a cooling rack.
Tips & Tricks for Success
Time of Cooking
- For extra-soft cookies, take them out of the oven just as the edges start to brown. They’ll continue cooking on the hot baking sheet, and the result will be perfectly chewy cookies.
How to Make Cheryl’s Cookies Even Better
- For an extra indulgent treat, add a sprinkle of sea salt on top of the cookies just before baking. It adds a delightful contrast to the sweetness!
Common Mistakes to Avoid
- Overmixing the dough: This can make your cookies tough. Mix the dough just until combined.
- Not measuring ingredients properly: Too much flour or sugar can throw off the balance of the recipe. Use a kitchen scale if possible.
Time-Saving Tips
- You can prepare the dough ahead of time and refrigerate it for up to 24 hours. This allows the flavors to develop even more!
Variations and Substitutes
Cheryl’s Cookies Variations for Different Diets
- Vegan: Use dairy-free butter and replace the eggs with flax eggs (1 tablespoon ground flaxseed mixed with 2.5 tablespoons water).
- Gluten-Free: Use a gluten-free flour blend to make the cookies gluten-free without sacrificing texture.
Creative Twists to Try with Cheryl’s Cookies
- S’mores cookies: Add mini marshmallows and crushed graham crackers to the dough.
- Peanut butter cookies: Add 1/2 cup of peanut butter to the dough for a rich, nutty flavor.
How to Serve Cheryl’s Cookies
Cheryl’s Cookies are perfect on their own, but they also pair wonderfully with these options:
- Best Side Dishes to Pair with Cheryl’s Cookies: A cold glass of milk or a scoop of vanilla ice cream are always great choices.
- Serving Suggestions: These cookies are perfect for a cozy evening with friends, a birthday party, or a holiday gathering. You can even wrap them in cute bags as a gift!
Nutritional Information
| Nutrient | Amount per Serving |
|---|---|
| Calories | 200-250 kcal (depending on size) |
| Protein | 2g |
| Carbs | 30g |
| Fiber | 1g |
| Sugar | 18g |
| Fat | 10g |
How to Make Cheryl’s Cookies Healthier
- To make the cookies healthier, try using less sugar or substituting some of the butter with applesauce.
- You can also add oats or whole wheat flour to boost the fiber content.
Conclusion
Why You’ll Love This Cheryl’s Cookies Recipe
This Cheryl’s Cookies recipe is the perfect way to indulge your sweet tooth without leaving your home. The result? Soft, chewy, melt-in-your-mouth cookies that taste just like the ones from Cheryl’s Cookies store. Whether you’re baking for yourself or sharing with friends and family, these cookies are bound to become a new favorite.
Let us know how your Cheryl’s Cookies turned out in the comments below! Don’t forget to share this recipe with your friends and family—everyone loves a good cookie. And for more delicious treats, follow us on social media! Happy baking!
Frequently Asked Questions
1. How do I make Cheryl’s Cookies soft and chewy?
To make Cheryl’s Cookies soft and chewy, it’s important not to overbake them. Take the cookies out of the oven when the edges are just turning golden but the centers are still soft. Additionally, using a combination of brown sugar and granulated sugar helps to keep the cookies soft and moist. Make sure to let them cool on the baking sheet for a few minutes before transferring them to a cooling rack.
2. Can I use a different type of flour for this recipe?
Yes, you can! If you’re looking for a gluten-free version, simply substitute the all-purpose flour with a gluten-free flour blend. If you’re looking for a healthier option, you can also try using whole wheat flour. Just keep in mind that the texture may vary slightly depending on the flour you choose.
3. Can I add other mix-ins to the Cheryl’s Cookies recipe?
Absolutely! Feel free to get creative with your mix-ins. You can add chocolate chips, white chocolate chips, M&Ms, dried fruit, nuts, or even a swirl of peanut butter. The possibilities are endless, so feel free to experiment to suit your taste!
4. How long can I store Cheryl’s Cookies?
Cheryl’s Cookies can be stored in an airtight container at room temperature for up to 1 week. For longer storage, you can freeze the cookies for up to 3 months. Just make sure to place them in a freezer-safe bag or container to prevent them from drying out.
5. Can I freeze the dough for Cheryl’s Cookies?
Yes! If you want to prepare ahead of time, you can freeze the cookie dough. Simply scoop the dough into balls, place them on a baking sheet, and freeze until solid. Once frozen, transfer the dough balls to a zip-top freezer bag. When you’re ready to bake, just pop the frozen dough onto a baking sheet and bake as usual, adding an extra minute or two to the baking time.